Reef aquarium sumps are easy to build with an existing tank and some spare glass. This post goes over how to do the actual work of construction. If you are looking to learn how a basic sump works, or how high to make the baffles, there is another page for that here: Reef Aquarium Sump Tank Design
What is in this guide?
- Test fitting equipment and design with a mockup
- Choosing the right thickness of glass
- Where to find glass for cheap
- Getting exact measurements for your cuts
- Cutting the baffles and dulling the sharp edges
- Silicone prep work – cleaning and taping
- Clamping and supporting the baffles during glue up
- Silicone application techniques
What’s not?
- Working with acrylic
- How high to make baffles – See Sump Design post as it’s different on every sump.
- Sump Turnover Rate or Reef Tank Flow
- Biology of Refugiums
- Dimensions for this sump
DIY sumps don’t have to be sloppy
You don’t have to shell out hundreds to get a sump that looks good. While it’s a little more work, you can build a decent looking sump with your own two hands. This guide goes over the methods to make it happen.
Getting good results
You may have seen some sump building videos on YouTube. There are quite a few. Many of the the people that make them seem to care about showing how fast they can do it, rather than doing a good job. They often end up with silicone gobbed all over the place or with baffles that leak and have to be redone anyway.
One thing you often hear people say about sumps is “small leaks aren’t a huge deal” and that sort of thing. This is not true.
If you have an unintended leak between baffles or dividers, it can cause problems. These problems may take a while to show themselves, say with an ATO sensor. It’s best just to do a good job with your seals the first time. Leak test the sump as you would any other part of your system.
Silicone Injection Method
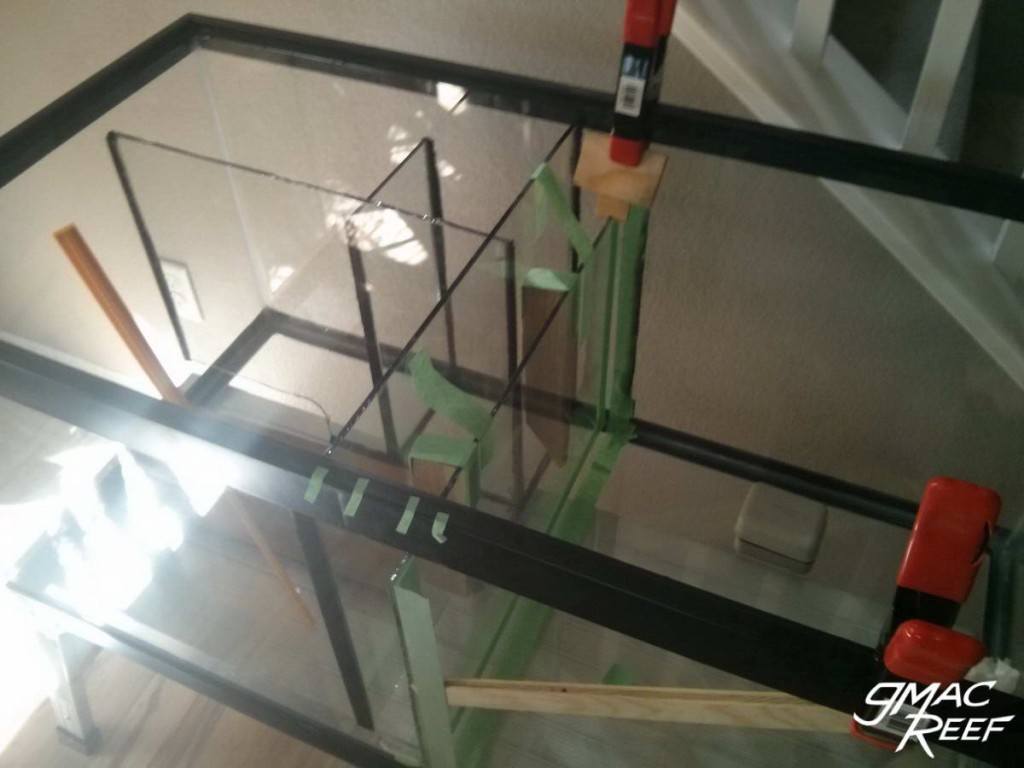
The methods in this guide are some of the same ones used by professional tank builders. First, the tank and panels are taped and prepped. After that, the baffles are bolstered into position. This is usually done with clamps on the edge of the tank holding small blocks of wood. Next, silicone is injected into the gaps. After smoothing, the result is a continuous bubble-free seam. Applying the silicone in one quick process prevents it from “skinning over.” This is when the outer layer begins the curing process and begins to toughen.
Professionals all have their own tricks of the trade, but this guide gives an outline of a way to copy them. It is not the only way to do it, but it results in far less air bubbles in the seams than other methods I have tried.
Starting out
Once you have planned out your sump and know the rough dimensions, you will want to come up with your final dimensions for each piece.
Getting final dimensions for Baffles and Dividers
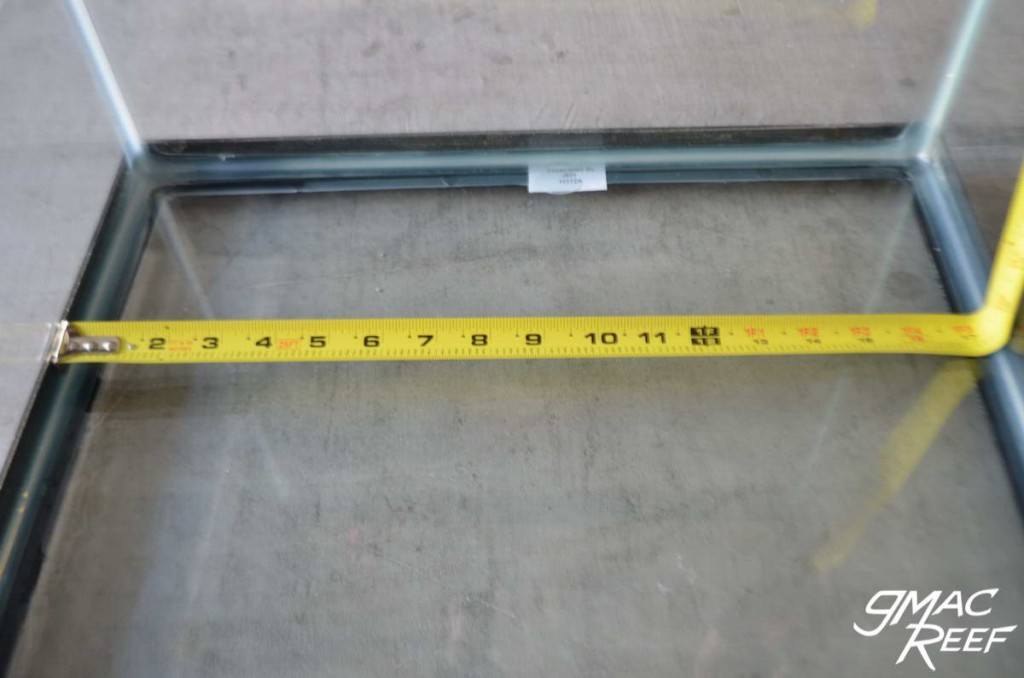
How to Measure – Allow about 1/16″ (1.5mm) to 1/8″ (3mm) gaps where the baffles touch the walls of the tank. This allows you to inject the silicone so it flows in the gap and creates a continuous seal between the two pieces. A gap closer to 1/8″ (3mm) allows the silicone to flow easier into the gap, if it’s too narrow, it becomes harder to inject in the opening.
For example, if you are measuring for a full-width panel that spans the tank front to back, here is what to do.
Say the inside measurement of the tank is 10″ wide. You would minus the 1/8″ gap from each side, adding up to 1/4″. Subtract that from the measurement and the resulting panel needed would be 9-3/4″ wide.
Apart from creating a good seal, the gap is left to avoid having to force or wedge a panel to fit which you should never do. While it doesn’t have to be too exact, it is better to have it a little loose than too tight. The silicone will fill gaps up to about 3/8″.
Spacers of the proper thickness will come in handy for this. Some people use zip ties or small pieces of plastic. In this build I used some rigid straws. The spacers on the sides can be removed as you fill the gaps with silicone. The spacers on the bottom should stay for about 45 minutes to an hour to prevent the weight of the panel from squeezing the silicone out from the bottom seal. You may also want to affix very small spacers to the bottom of the piece that will be permanently in there.
Planning your assembly
Test fitting
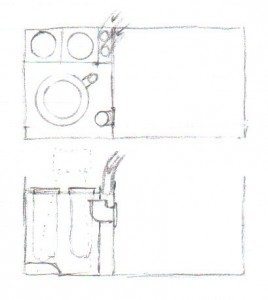
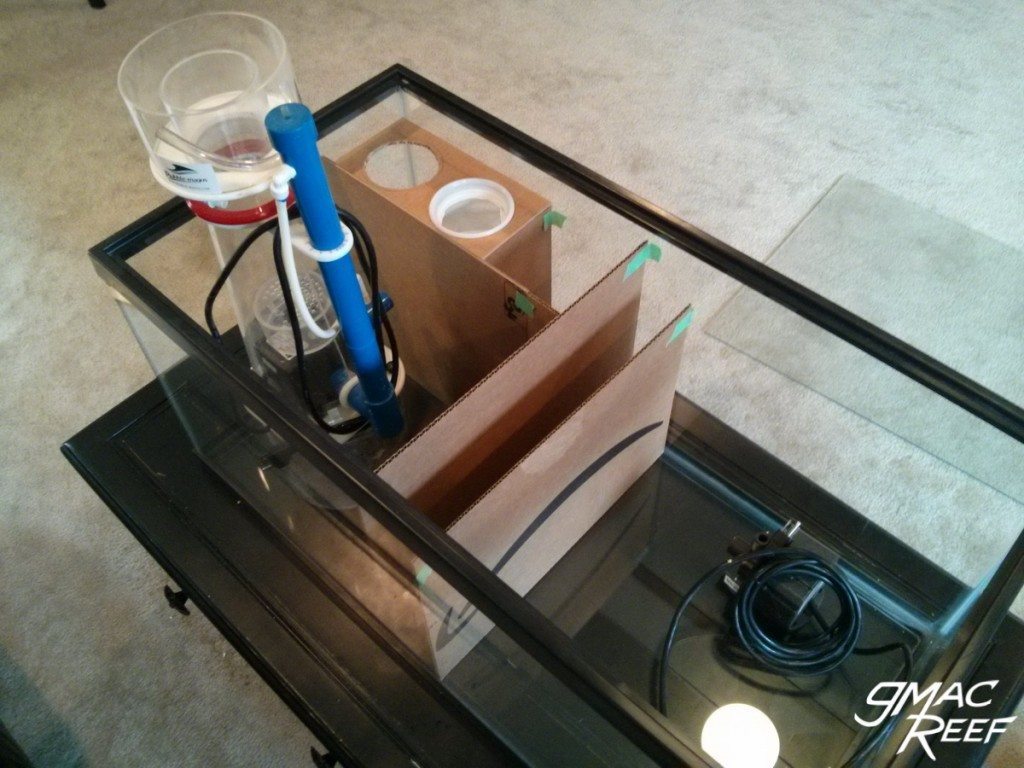
Once you calculate your final measurements, it’s helpful to do a mockup with cardboard. Just cut the pieces with a box cutter and tape them in the aquarium. This little extra step allows you to check a few things and identify any spacing problems with things like your skimmer or other equipment that might not be as evident on paper.
It might seem unnecessary, but this does a couple things for you.
- Once you cut a piece of glass, you can’t really just shave a quarter inch off it if you make a mistake. You get one shot or you must start over using a new piece.
- It’s nice to lay out the footprint of where everything is going to go. You might discover a piece of equipment won’t squeeze into a chamber like you intended. You’ll also find out what areas will be hard to access with your hands (say for cleaning or netting out fish).
Once you do this test fitting and you know how big to make the panels, you can either cut them yourself or take your order to a local glass shop.
Selecting the Right Glass Thickness
You will need your baffles to have some strength. Strong panels will stand up to being knocked around a little. When you are trying to wrestle a piece of equipment out of there while hunched over the sump, you aren’t thinking about being careful. Even doing some aggressive scraping of the glass will test them a bit.
Aside from not breaking easily, thicker glass prevents flexing or bowing from water pressure.
The point is this – a broken baffle in a full sump is no fun. It means draining, drying, scraping, and all of the hassle that comes from having your sump offline for enough time to re-cure new silicone.
Using 1/4″ (6mm) glass is what you should aim for for thickness. Quarter inch glass is also sometimes called plate glass. If you can’t find glass this thick, you might resort to something around 3/16″ (4.5mm), but that’s about the minimum.
1/8″ (3mm) glass is easy to find at home improvement stores. It is too brittle and you should avoid it.
A good source of glass is from an old tank. You can buy one for cheap. There are a lot of tanks on Craigslist or in second hand stores.
If you are looking at taking the glass from an old aquarium, start looking at tanks sized 29-35 gallons and up. Glass of at least 3/16″ (4.5mm) is found on these tanks. It can be a bit of work to dismantle a tank with razors and some wire, but you can potentially save a lot of money. Glass shops can charge a lot money for custom cut panels.
What about Acrylic Baffles?
Some people use acrylic baffles in their sump. This is often done because it is a little easier to cut and work with.
In a glass sump, you should ideally use glass baffles. Using silicone to affix acrylic panels to glass doesn’t work well in general because it can only form a very weak bond. Bulk Reef Supply actually did a good experiment to show glass vs. acrylic silicone bonding. For a strong permanent bond, glass panels work best. It is also nice to be able to use a razor blade to scrape them after several months of use.
What type of Silicone?
Use a brand of silicone that is right for the job. Whatever brand you choose, you must ensure that the one you choose does not have any mildew-resisting chemicals in it such as brands made for use bathrooms and kitchens. There are a lot of types of silicone available at your local hardware store but they are all low grade sealants rather than adhesives. The easiest thing to do is just to get the good stuff from Amazon instead of trying to save $5. A good brand is “GE SCS1200” which has very good strength and about 15 minutes of working time. It is often recommended by professional tank builders and what is used in the build shown in this post. Another brand that gets recommended a lot is “Momentive RTV103”.
A single tube of silicone should be enough for 4-5 baffles. On this 40 gal sump I used 3/4 of a tube.
Preparation
Cutting Glass Pieces
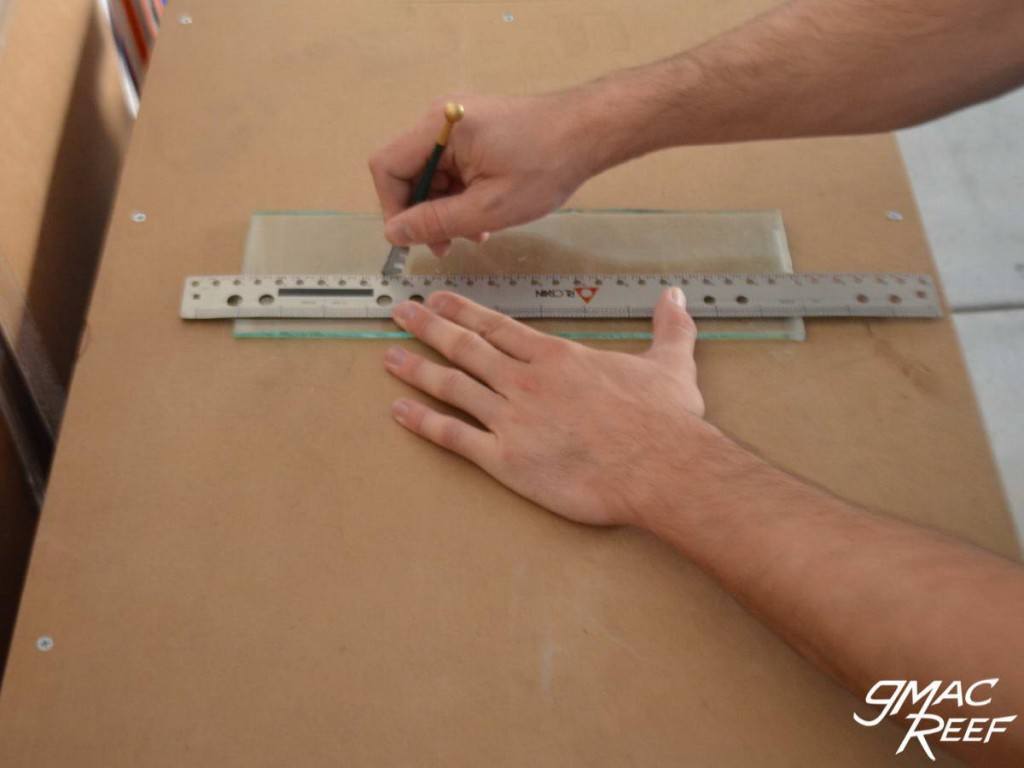
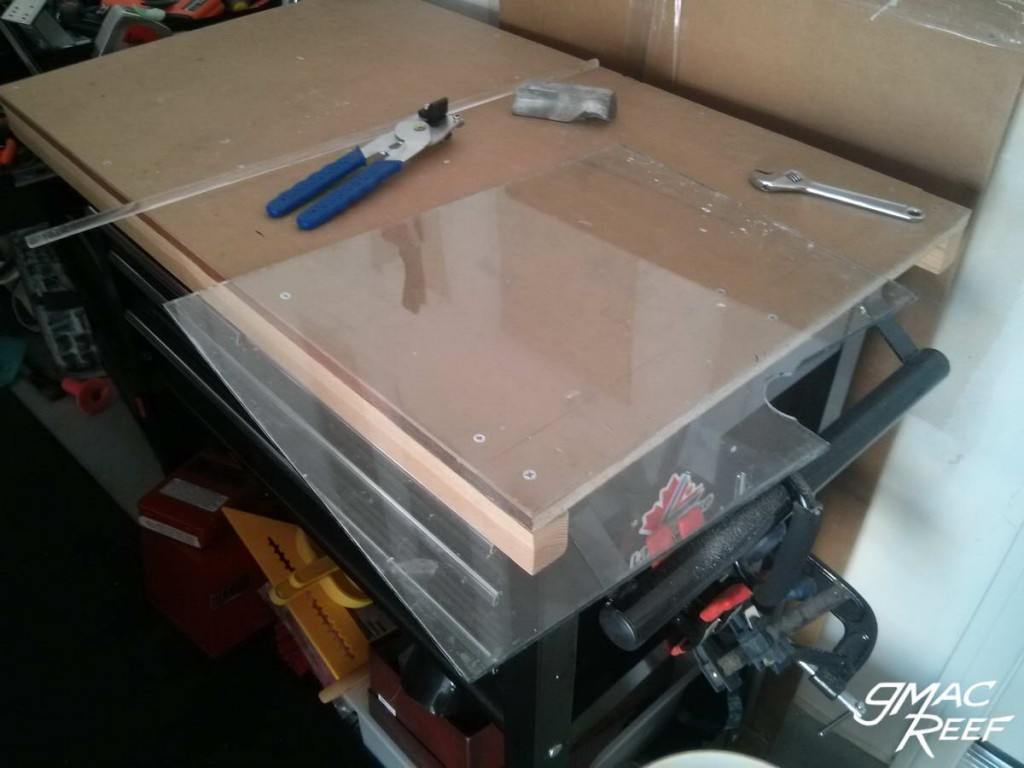
Using a standard glass cutting tool and a straight edge, the piece should be scored with a nice clean motion. Never go over the same score twice as it will dull the cutting wheel. It is worth it to do a little research on YouTube on the proper technique for this, but I won’t get into it here.
Roughing and shaping the panels
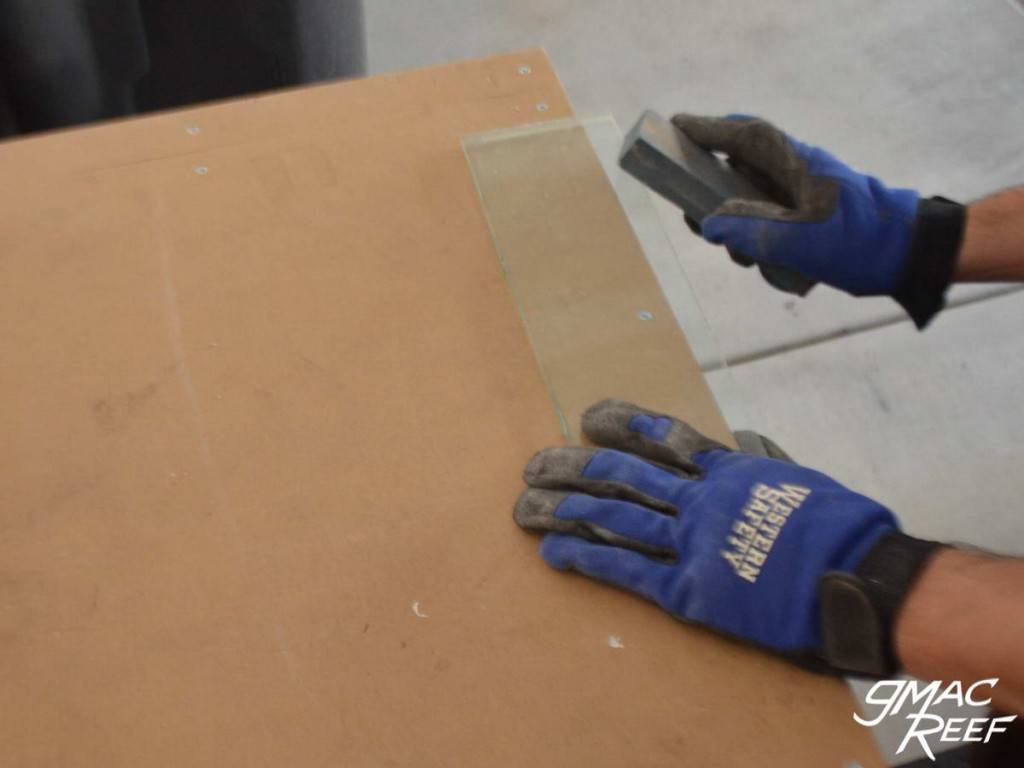
The edges of a newly-cut piece of glass can be extremely sharp. Edges should be ground with a sharpening stone or sanding block just to take off that sharp edge. Dulled edges will make it safe to reach in the sump with your hands and arms. If you are having a glass shop cut your panels, they can polish the edges but you really just need to dull them down. Wear gloves when sanding or grinding the glass.
Panels that sit on the bottom will rest on the silicone of the existing tank. This something we need to be careful of because the newly cut piece may have very sharp corners. It’s a good idea to nip the corners and sand them with the sharpening stone just so you don’t mess with the seal on the existing tank too much.
Cleaning the Glass
After cutting and sanding the edges, it’s time for prep on the pieces. You can start with wiping down the pieces with just water and some paper towel to clean them up a bit.
If you are using repurposed glass, you need to do a good job getting the pieces clean enough to get good adhesion. This is mostly important on the areas that will be bonded near the edges.
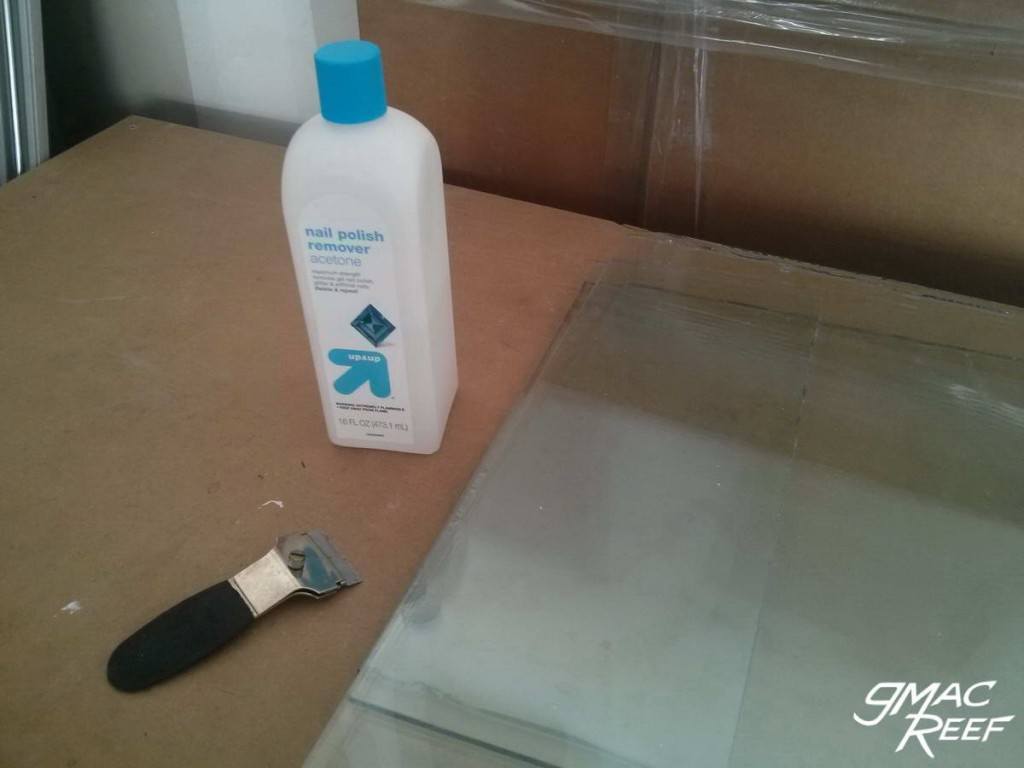
Parts of the glass that will be covered with silicone should be scraped with a razor blade and cleaned with Acetone (nail polish remover) or Rubbing Alcohol on a paper towel. It’s a good idea to take your time with this step and do a good job. This will remove any old silicone and clear off fingerprints for the best possible bond.
Installing Panels and Baffles in a Sump
In the sump design post I show water moving from one end of the tank to the other, flowing from chamber to chamber like a waterfall. This is done to make the concept simple to explain and show.
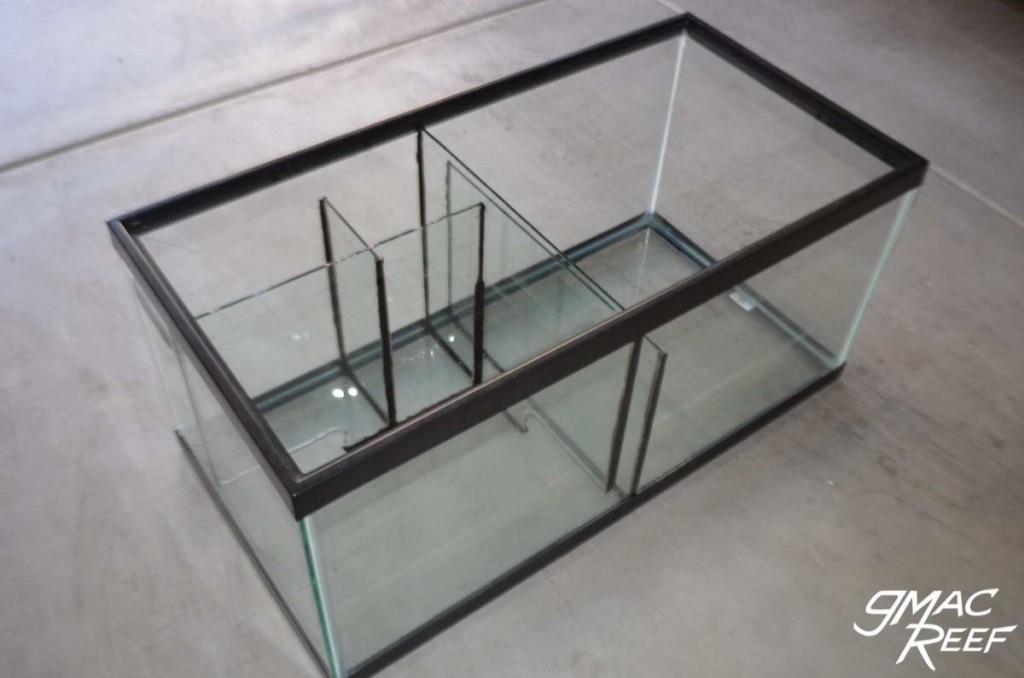
Most sumps you see are designed very simply – by placing a few rectangular baffles in there that span the width of the tank. Nothing wrong with this, it’s the easiest way.
One thing to note however — while you can’t really form glass into whatever shape you want, you aren’t just stuck with rectangles either.
There is a lot more you can do with a sump when you realize this.
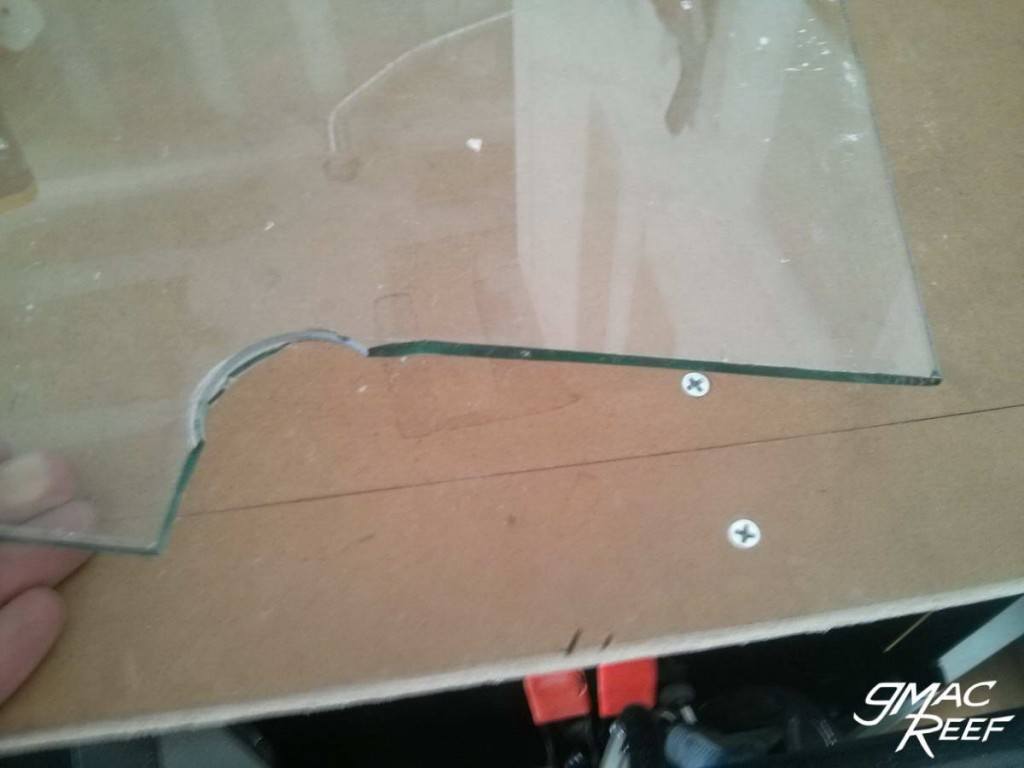
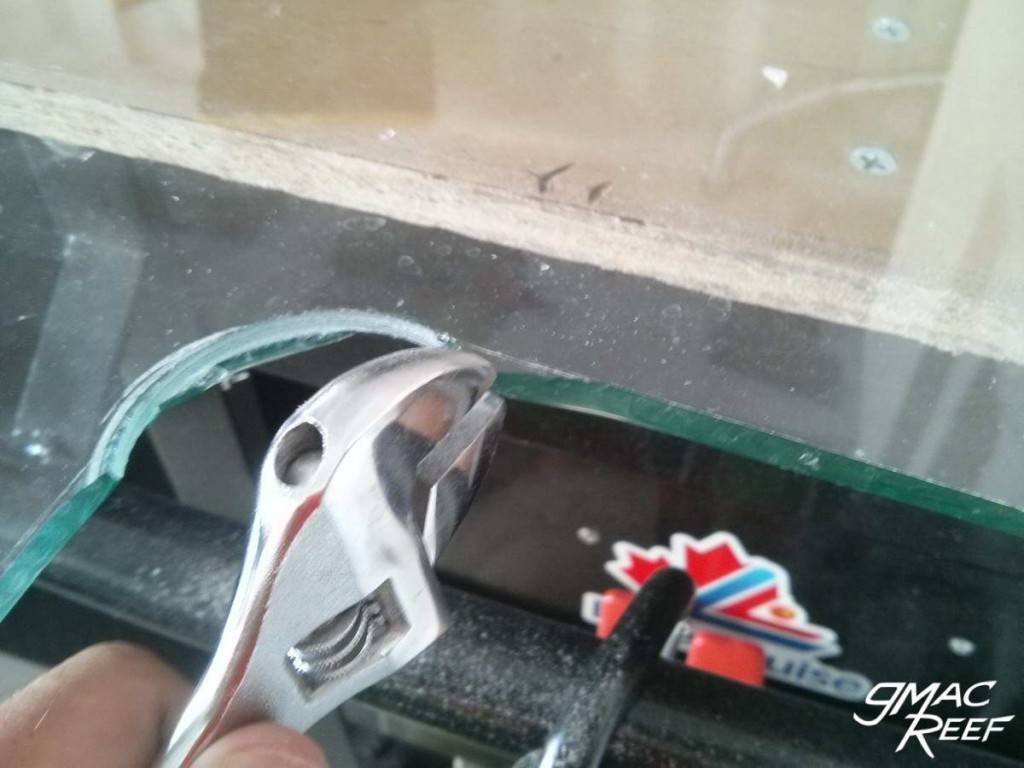
Creating openings for water to pass through makes it so you don’t need too many baffles. Fewer baffles means you save space. Cutting a notch in the corner of a baffle is one technique you can do, and this is how to do it.
Cutting a Notch in a Corner of a Glass Panel
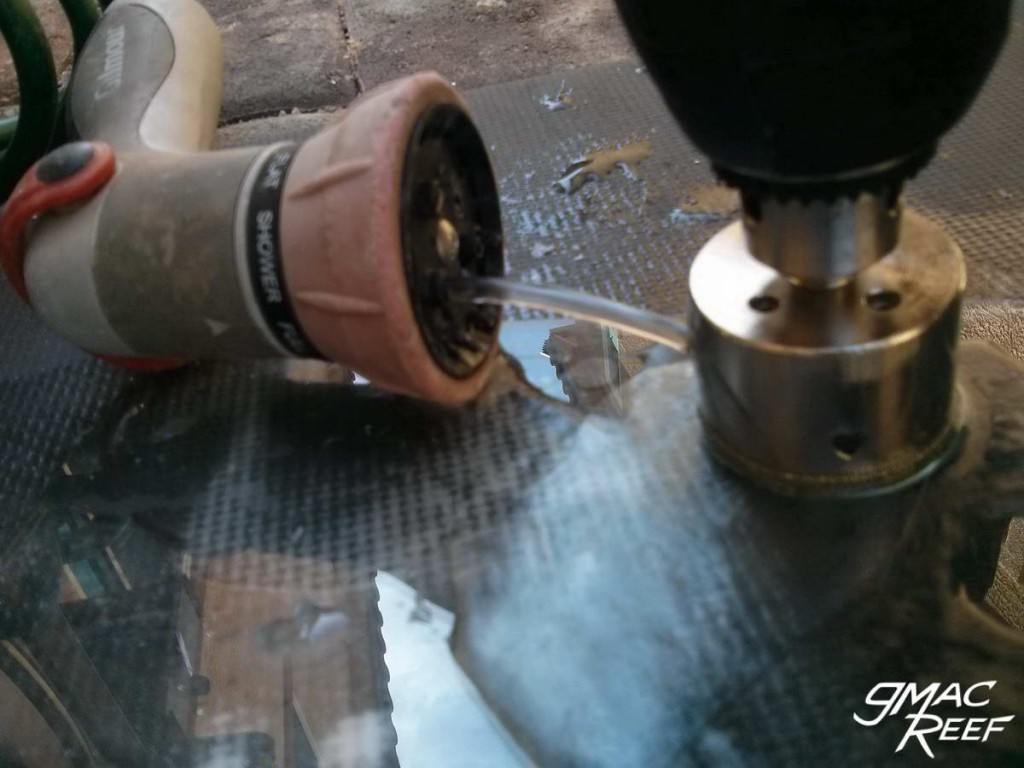
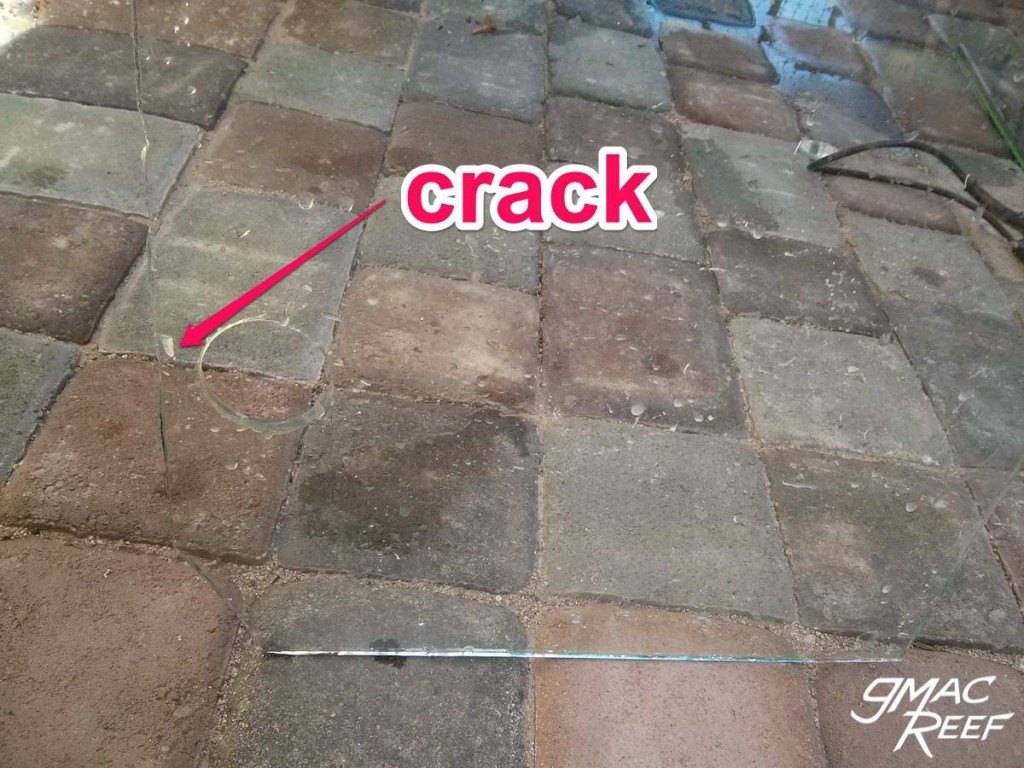
This method shows how to create a corner notch in a glass baffle. First drill a hole, then make relief cuts to remove the material you want. More info about how to drill glass is on this page: Drilling Holes in Glass Aquarium Tanks
Here is a video showing cutting a corner notch with the same technique but with better tools and results. It is easier to get a good clean hole without chip-out with thicker glass.
Securing Panels and Final Preparations
In this example I am showing the process I followed on a brand new 40 breeder. I got the glass for the dividers from an older 35 gallon that I cut apart (3/16″ or 4.5mm thickness).
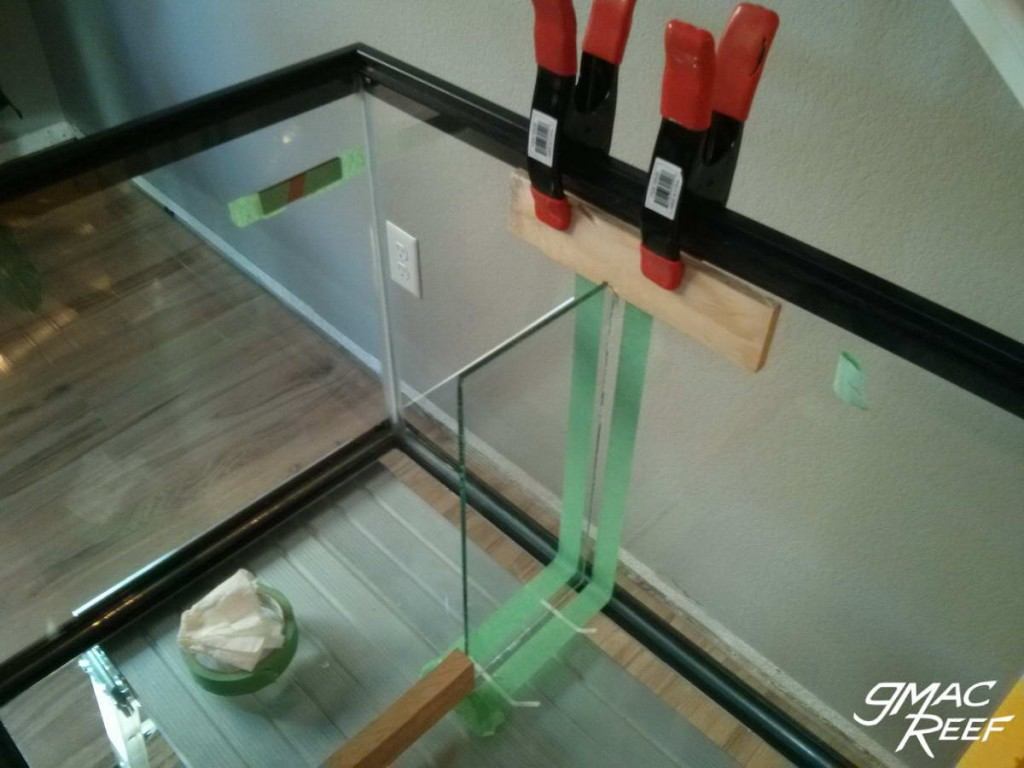
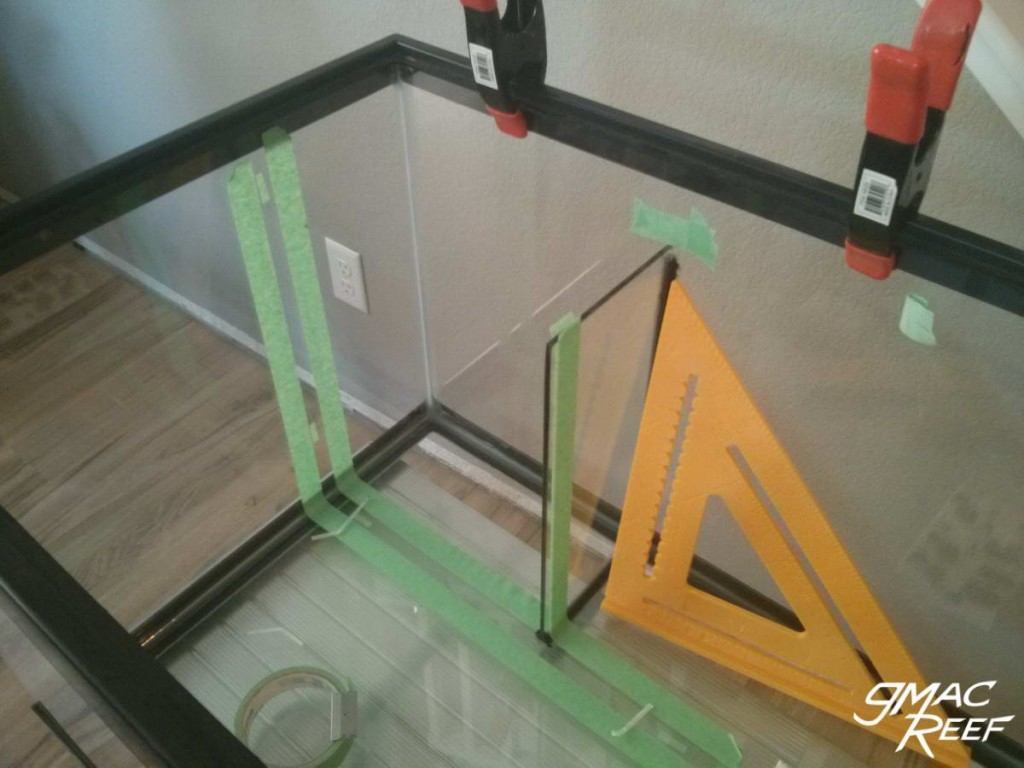
It is handy to have some scrap wood to help secure the pieces as you work on them. Wood blocks secured with clamps will help to hold the panel you are working on. Spacers placed around the edges will help to create the proper gap (1/8″ or 3mm) around the piece.
Taking a little more time to secure the panels with spacers and wood blocks might add time to each step, but you’ll be glad you did. Silicone that has high strength has less working time than you might be used to, and you want to apply it in a quick deliberate process.
Smoothing and Removing Tape
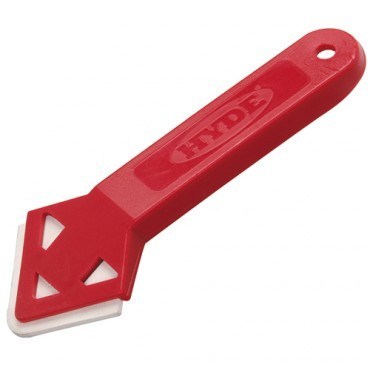
Taking time to prep each seam will result in a much nicer end result. Each panel can be taped off along with the edges of the tank (as shown). After applying the silicone and smoothing it with your tool, remove the tape right away while the silicone is still wet.
Applying Silicone
During the few minutes of time when you are applying the silicone, you will learn a lot. Your preparation with taping and securing the glass panels will be evident.
The amount of silicone needed can vary. It depends on how you measured and cut your panels. For example, if you made the gaps between the existing tank and the edges of the panels larger, then more silicone will be needed. The target is about 3mm or 1/8″, so with a larger gap than that, you will be pumping the gun more.
If you only left a very small gap to fill (say less than the target of 3mm or 1/8″), less silicone is required. This may make it more difficult to get a good seam however, because the tube’s tip will have to be pressed firmer into the joint as you squeeze it out. This might make you work slower, and the silicone will get tacky as you use up the working time.
The way you cut the tip of the tube can also affect the process a lot. Some people cut the opening at an angle and then clench it with pliers to make it flatter. A lot of it is personal preference.
If you are working with a panel that is close to another such as a bubble trap, then you’ll only be able to apply the silicone from one side of the joint. In this case, you want the silicone to easily flow through the joint when it’s squeezed in from only one side. A proper sized gap (closer to 3mm or 1/8″) would be helpful in this situation to get the silicone to create a continuous seam.
Applying silicone needs to be done swiftly to get nice looking results. There are too many techniques and concepts to describe fully, and tank building is a skilled art. Experience will teach you more than reading tips and tricks ever will.
Curing time
It is very important to let the silicone cure for at least 7 days. 2 weeks if possible. This is done to protect your system from the effects of off gassing in the curing process.
Recap
You will discover many tips and tricks of your own as you work. Your 2nd sump with probably turn out better than your first. You will probably realize this is one trade where experience really counts.
Yet another excellent article gmac, thanks so much. My question is how do you inject the silicone into both sides of the glass panes that form the baffles if they are close together? I would like to use Marine Pure’s 8″ X 8″ X 1″ bio-media plates between baffles just a tad bit more than one inch apart (due to sump space restrictions), but for the life of me, I can’t figure out how to. The first weir of the baffle will be easy, but getting a nice silicone bead (and solid flow-through) on both sides of the other two plates seems almost like an impossible challenge if they only an inch or so apart. Do I just settle on silicone-ing and smoothing out one side on these since there won’t be much water pressure in them or do you have a special technique? Thanks again! – Joe Mac
Thanks for commenting, you bring up a good question with that. I don’t have a special technique and ran into the same problem. If your baffles are close together then I don’t think there is a way to get a tool in there to smooth the inside edge after injecting the silicone. The gap between the two baffles on this build was about 2″, and that was still too narrow to get my hand in there with the caulking tool in there to smooth it out.
If the silicone flows under into the gap you will get a good seal, and you can still tape and smooth the outer side of the panel for a mostly clean look.
I have seen some people use a short piece of airline tubing on the end of their silicone tube nozzle to get into hard to access areas. If anyone knows any helpful techniques then please leave a comment or email me.
When I made my sump I used an 18″ length of 1/2″ wood dowel rod to be the “tool” to press the silicone into the joint on the baffles that were too close to use a standard tool.
I will try that the next time I build a sump. Thanks for the tip.
OK I think I read through this great information. But I have one question. What should be the height of the baffles? I already figured out the best thickness and length but the height is where I am getting lost. Any help on this is greatly appreciated!
The heights of the baffles depends on a few things like the size and shape of the sump. The first (and also tallest) baffle/weir also depends on the water height requirement of the skimmer. The weir height should be your skimmer’s optimal water height, plus a few inches. So lets say it needs at least 8″ – you would add a few inches of height, and use a stand to raise the body of the skimmer up from the bottom.
This page is more of a how to build guide, there is another page about designing the sump and figuring out how much water each chamber should have in it here:
http://gmacreef.com/reef-aquarium-sump-tank-design/
Okay thanks for the information. I will read the other article. I just purchased the Bubble Magus Curve 7. The specifications say the following: Tank Capability: 185G-240G
Pump: ROCK – SP2000
Pump power: 16W, 110V 60Hz
Dimensions: 9.25″L x 7.87″W x 20.8″H
Water Level: 9.5″-11″
So since it says a max height of 11″ I will make the first baffle 11″ and use a stand to bring the skimmer to about 8 or 9 inches. Is this a good approach? Some back information. My sump is made of glass with dimensions of L: 30 1/8″ W: 12.5″ and H: 18 3/4″. Volume of the sump is approximately 30.6 gallons. My display tank is approximately 75 gallons.
Thanks!
Okay that’s weird just posted a reply but its not showing up on here. So here is my reply once more. Thanks for the quick reply. I ended up being a Bubble Magus Curve 7. The specifications from MarineDepot.com say the following
Tank Capability: 185G-240G
Pump: ROCK – SP2000
Pump power: 16W, 110V 60Hz
Dimensions: 9.25″L x 7.87″W x 20.8″H
Water Level: 9.5″-11″
Would it be safe to do the following? I will make the height of the baffles 13″ since you mentioned, “…your skimmer’s optimal water height, plus a few inches.” Since the optimal max is 11″ would 13″ be okay? Then I will use a skimmer stand and adjust height. Just some back information. The sump I am using was a used glass display tank which measurements of L: 30 1/8″ W: 12.5″ H: 18 3/4″. The approximate volume in gallons for this sump is 30.6 gallons (my new display tank is 75 gallons). I read the article and based off of my measurements the baffles should be 12 1/4″ wide and now with a height of 13″ and 1/4″ thickness.
Is my approach correct? Does this make sense?
Thanks again!
Yes that sounds like it will work. There is more of a problem with making the first baffle too short than too high. You can always raise the skimmer up a little higher with a stand or riser. Every skimmer has an optimal level, and finding this out can take some experimenting.
It’s also a good idea to calculate the needed volume of the last chamber (where the return pump is located.) To do this you add up the areas where water drains when the return pump is shut off. The sump design post goes over how to do this in more detail. There is a reason to figure this out beforehand — you can find out if you are going to have enough room for a 3-chamber design, or will just be able to have 2 chambers. With your 75gal and only a 29 gal sump filled about 1/2 to 2/3 full, it may be best to only have 2 chambers.
First off…your website is fantastic for a newbie like me…very grateful!
I’m planning on easing my way into a reef tank from freshwater. I recently acquired a used 75 gal. MarineLand NV97003 tank, and have it on a test stand in my shop. I also got a 20L tank for a sump, and would like to design a sump that would work for both fresh and eventually reef. From the research I’ve done so far (much of it from your site), it seems that mechanical filtration is more important in the fresh sump, and less so in the reef sump, so I’m thinking I need some socks or trays for filters to start with….but need to make room for a skimmer later on, possibly even a DSB or other reverse photosynthesis chamber.
Long story short…is this possible to design all in one, or should I just focus on one, and modify later when I make the jump?
Filter socks are about all the mechanical filtration you will ever need, so I don’t think you would have to alter the design if you included them. If you don’t want to change them as often, you can just design the sump to accommodate 3-4 of them. I like the Mesh 200 Micron ones because you can just take them outside and blast them with a hose – it takes like 30 seconds. Felt ones clog easily and are a lot more work to clean without using a washing machine.
In case my filter sock clog how much space do I need from the the top of first baffle to the top of the aquarium for room for water to over flow into the next chamber.
It depends on how much flow is running through the sump and the width of the baffle in question. In most cases the amount of space you need above a baffle to the top trim isn’t more than 1 inch.
On your sump design you have a place for two filter socks. I want to copy this design but are you able to get 2 holes that are 3.75″ wide on a 5″ by 9.5″ piece of glass with out cracking?
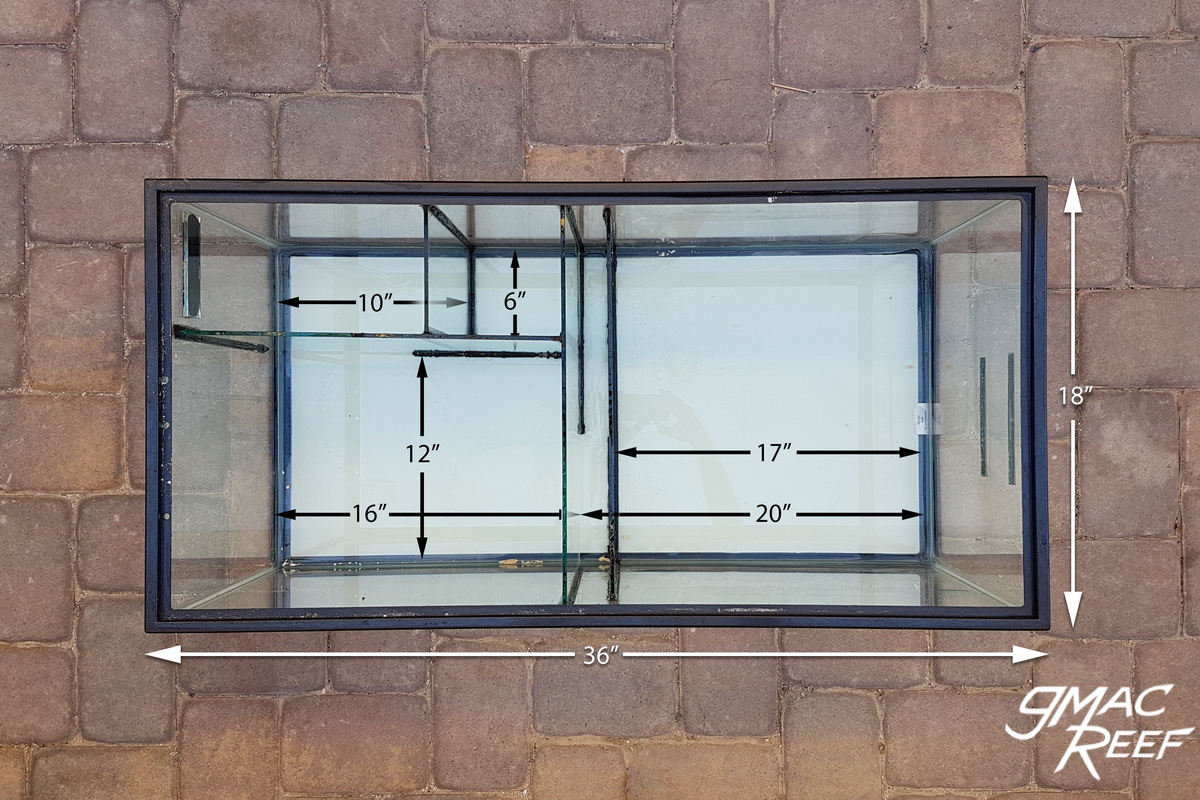
The filter sock holder is made of 1/2″ HDPE Plastic (aka Starboard) and I found an 8″ X 12″ piece on Ebay for about $12 shipped. Not sure if it could be made of glass. The filter sock holes need to be a fairly precise size so that the socks fit snug and don’t float up. It’s best if you already have the socks you are going to use before you cut the holes. I used a hole saw initially to cut the holes a bit undersized, then used a router to hog out the hole to make it a bit bigger. I have had a few people ask about the sump design dimensions, so I made a new post with the actual baffle sizes 40 breeder sump plans.
so everything is glass besides the filter sock holder?
Yes, all the panels are glass.
Is there a reason you used 1/2″ HDPE Plastic (aka Starboard) instead of 1/4 inch acrylic?
With the design of the tray, I needed to Dado cut the two ends so I needed the extra thickness. The tray rests on the 1st small baffle, and then a small piece of glass I siliconed to the wall of the sump near the corner. I found some pics I took when I made it, I will add them to the post soon but for now I made an imgur: https://imgur.com/a/PEeALZY Edit: I finished the 40 Breeder Sump Plans post that shows the shape of the sock tray insert.
Its 2018, how is your sump holding up, as far as the particular sealant you used? The GE SC1200. Because I bought a tube for the same application reccomended by you and the small print on back states; Not for use on stove-pipes, fireplaces or BELOW WATER. I’m using to reseal a whole aquarium and don’t want to run the risk of leakage.
Thanks.
The sump has been in use for 3 years now and I have had no issues. This brand (GE SCS1200) is quite a bit stronger than the types of silicone you might be used to working with.
After letting the bottom seam set with temporary spacers, do you just smooth out the silicone to cover the spacer holes? Thank you.
If I remember correctly, the spacers are removed after you add silicone to one side of the panel. When you fill in the other side, the small holes where the spacers get filled in.
In the future I think I would try tacking the panel into place with a very small amount of glue from a glue gun, then adding the silicone seals on both sides. This would give a good amount of control and set the panel with the right gaps without using removable spacers.
Have you tried the hot glue method of tacking the baffle in place, since posting this?
I’m having trouble picturing how to use spacers under the baffle. As soon as you remove the spacers, the glass panel would just settle and drop down to sit on the glass bottom of the sump (pushing the silicone out from underneath in the process), wouldn’t it?
On the sump I made, I used some rigid plastic straws to create a gap under the panels. It worked alright, but I had to add silicone back to the spots where the straws were after a few hours. Not as clean of a method as I would have liked.
My last tank was a 55 gal Euro-braced cube. It was built by a custom tank maker.
On that tank, the seams had spacers between panels of glass that were left in permanently. The material was a very small square of a clear plastic. The spacers measured about 2mm X 2MM and about 1mm thick. You had to look pretty hard at the silicone seam to see them but they were there. Something like that would support the weight of the glass panel. The spacers could prevent the panel from squeezing all the silicone out from the joint.
As for the hot glue – right now it’s just an idea. I may add another baffle to my existing sump soon and try it out.
Using some very small tabs of hot glue, it would be fairly easy to create a small gap under and around each baffle. I would use a razor blade to clean up the glue a bit, then inject the silicone into the joints. The glue would help support the baffle in position while applying the silicone.
Can you explain the small chamber next to filter socks; the narrow one beside it? Also, I am assuming the notch in the baffle between socks and skimmer is for the pump inlet on the skimmer, but please verify my assumption. We all know what happens when we assume lol
That compartment next to the filter socks is where the drain outlet pipes go. The water dumps down into that area then flows over the filter sock plate and through the socks. The notch on the panel between socks and skimmer compartment simply allows water to pass through it to the next section. I have recently cleaned out my sump and I have taken more photos of the setup, which I put on a new page: 40 gal sump plans Thanks for commenting.
Great guide. Was wondering if it is okay to have a 3 mm gap between panes to build a braced 36x24x16 tank using injection method?
3mm is probably too large of a gap for building a tank. I was recently doing some work on my sump and added a baffle. I was looking around on YouTube and found this really good video about using the injection method where the panels are spaced using toothpicks. I added the baffle to my sump using the method, and it worked better than other techniques I have tried in the past to create even gaps where the silicone can flow into. Definitely check out the video if you are planning on building a tank. Thanks for commenting. Here is the link: https://www.youtube.com/watch?v=GNoU7a-SZ6Q